Application
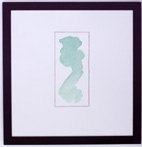
The Rotation Hanger (R-Hanger) is a patented system for mounting framed art. R-Hanger is developed to fit the thin wooden frames used for graphic art, photography and framed letters or diplomas, but work equally well with so-called Poster frames. No system has previously existed which could be used both by museums and private individuals, fulfilling the following minimum standards:
- Theft protection
- Strength
- Stability
- Aesthetics
- Reusability
- Permanent mounting on removable frames
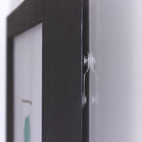
R-Hanger can be used on any type of wall. The frame must be at least 10 mm wide and 10 mm thick. R-Hanger can be mounted permanently on removable frames. A frame fitted with R-Hanger hangs parallel to the wall at a distance of approximately 3 mm.
Target Group
R-Hanger is used for hanging art in public spaces without theft alarms, and where high aesthetic standards are required. Example: photography exhibitions.
Description
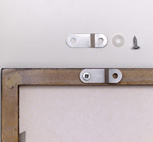
The patented R-hanger is manufactured in very strong sprung steel with a specialised design. At each end of the plate, a 3.5 mm hole is punched. R-hanger is mounted on the back of the artwork frame. Nylon washers, placed between the frame and the R-hanger, and between the R-hanger and the wall, guarantee an even and smooth rotation without damaging either wall or frame. In total, four plates are required for theftproof mounting. Screws delivered together with the R-hanger have a recessed head to enable R-hanger to be centred when mounting. R-hanger can tolerate a load of 10 kg without bending, and the load must exceed 500 kg for the R-hanger to break.
Delivery
R-Hanger is delivered in packages of 100 R-hanger units including 200 nylon washers, 100 recessed head screws with rawlplugs (3,5 x 10,0 mm) and 100 (3,0 x 25,0 mm). One package is sufficient for 25 frames.
Instructions for use
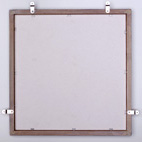
Step 1 - Mounting on the frame
1) Two R-hangers are screwed in parallel to frame's upper edge, as close as possible to the edge. Note that the R-hanger's long tongue must be mounted towards the frame, and a nylon washer placed between frame and R-hanger. Use screw matching frame profile's thickness. Frame must be at least 10 mm wide. Place plates at right angles to the frame and tighten screw gently so that R-hanger remains in position.
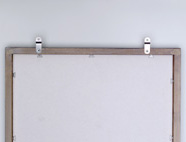
2) Screw in the other plates as far in as possible on the back of the artwork frame's outer sides, but no further in than 20 mm. Place these R-hangers too at right angles to the frame and tighten screws.
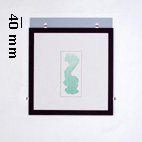
Step 2 - Wall mounting
1) Place frame's upper edge 40 mm beneath the final position. Ensure that picture's upper edge is horizontal and that the R-hanger is at right angles with the frame. Screw frame tight with the screws provided (3,5 x 16,0 mm). Ensure that screw is centred in the R-hanger's hole. Don't forget the nylon washer between the R-hanger and the wall. When both screws are tightened, the picture is hung, and both hands are free for the next step.
2) Turn frame 90 degrees clockwise. Screw the right-hand R-hanger into the wall as described above. Ensure that the R-hanger is at right angles with the frame and that the screw is centred in the hole with the nylon washer between the R-hanger and the wall.
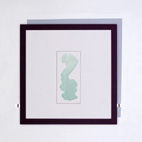
3) Turn picture 180 degrees and fasten the final R-hanger.
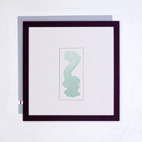
4) Turn frame one final time 90 degrees clockwise so that all plates are hidden. If all R-hangers were at right angles with frame when they were screwed tight in the wall with centred screws, the frame will be hanging with a horizontal upper edge.
Dismantling
The frame is dismantled step by step in the opposite order to mounting procedure. The R-hangers may be left in place on the frame.
Summary
T-Hang
| Art. Nr. | Product | Load limit / frame |
|---|---|---|
| 60-600 | R-Hang | 10 kg |